Showing posts with label DIY. Show all posts

Wednesday, July 23, 2014

Monday, July 21, 2014

Around the House Cleaner Series: Leather Cleaning and Conditioning

Leather furniture and accessories are more expensive, so is it worth it?! My daily-user purse is bright yellow leather, so you can imagine the dirt it shows!! It got to a point where it really needed to be cleaned, but I wasn't sure how to do so without ruining the leather, but I found an easy, non-toxic solution!

Wednesday, July 9, 2014

Around the House Cleaner Series: Stain Removal for Carpets and Furniture

If you live in your house, you will drop something unsightly onto your carpet or furniture, but you don't need to bust out an expensive and toxic stain remover to clean it up. Good ol' baking soda and vinegar will take care of most stains!
photo credit

Wednesday, June 18, 2014

Around the House Cleaners Series: DIY Non-Toxic Wood Cleaner

Hopefully, if you've been reading this blog, you won't be surprised by the "junk" in your cleaners, including your wood cleaner and polisher. And, you should also know by now that you'll save yourself a bunch of money by putting a few inexpensive ingredients in a bottle yourself. But, just in case you're new here, you should know that Pledge (link to EWG database for brand) or other popular brands, aren't your friends.

Monday, May 26, 2014

Laundry Room Series: Natural Detergent Options

photo credit
Soon after discovering the high toxicity levels in the products around my home, laundry detergent was high on my list to replace fast. The clothes that are against my skin all day, all the time have soaked up the toxins in the soap they're washed in and are transferred to my body. And what's absorbed through my skin goes into my blood stream, thereby affecting my entire body. When broken down as such, it sounds a little scary, right? It did to me anyway, so I looked for a solution. Many natural bloggers offer DIY solutions involving things like boiling huge amounts of liquids, grating soap bars, and other labor and time intensive activities. That was an immediate turn off! I have found simple, natural laundry detergent solutions!!

Friday, May 2, 2014

Feel Good Friday: My Favorite Deep Conditioner

photo credit: Atalanta Black Star
Happy Friday! I don’t know about you, but we here on the East Coast are just finally getting a taste of warm weather. After such a brutal winter, the sunshine is a most welcome change. These first few days have done wonders for my spirits and help to banish my winter blues. My mind isn’t the only thing eager to shake off the doldrums of winter; my hair is practically begging for some moisture after the harsh, dry winter months. So, this weekend, I will treat myself to my favorite deep conditioner, which helps to restore moisture, shine and elasticity to my hair. And, of course, I’m sharing it with you! This deep treatment is chock full of natural ingredients that are awesome for your hair and can be found right in your own kitchen.

Monday, April 28, 2014

Kitchen Cleaner Series: DIY Natural Kitchen Counter Cleaners

If you spend any time in the kitchen during the day, then your counters probably should be wiped down before the day's over. We usually cook all three meals each day, so the counters sometimes need an extra cleaning midday. Let's take a look at how some of the typical store-bought granite cleaners rank on EWG. First, here's the list of granite cleaners they've investigated so far:

Monday, April 21, 2014

DIY 2-Ingredient After-Shower Spray

This post will round out my series of bathroom cleaners. If you missed a post, I'll link to them at the end of this post. All that water and soap residue isn't the greatest to just leave sitting in your shower when you're done. To help combat fungus and residue build-up, you may already use one of the cleaners shown below, as reviewed by the EWG.

First is the method Daily Shower Spray in Ylang Ylang scent. Unfortunately, this product doesn't disclose all of its ingredients on the label and EWG hasn't been able to figure out all of them yet. However, as you can see below, it does rank in all of areas of concern. It's listed at $3.19 online.

Wednesday, April 16, 2014

Glass Cleaner: Is there another option besides Windex?

Dirty mirrors and streaky windows and doors have to be cleaned, and you probably use Windex, right? Who doesn't? It seems like Windex has been around forever. Well, tradition doesn't always make it good. Check out the EWG report on Windex below:

Monday, April 14, 2014

DIY Natural Disinfectant for Scrubbing in Bathrooms and Kitchens

This week I'm sharing my natural bathroom cleaning solutions, which can also be used in other areas of the home. Store-bought bathroom cleaners are some of the worst offenders when it comes to toxic cleaners because they're concentrated and have strong odors. The Environmental Working Group has figured out what's in many toilet and tub cleaners and published the results. Below are some screenshots of their findings. First is a picture of all the toilet cleaners they inspected. As you can see, over 50% received an F rating because they include several toxic chemicals that can lead to cancer, respiratory problems, developmental and reproductive issues, and trigger skin allergies. Even some cleaners that are branded "natural" received an F rating!!!

Thursday, April 3, 2014

DIY Non-Toxic All-Purpose Cleaner

There are lots of things you could add to your all-purpose cleaner, so I'm going to give you a few ideas. You can use this cleaner on counter tops, stove tops, and sinks, although you may need something more abrasive at times for cleaning those areas, which I'll share about another time.

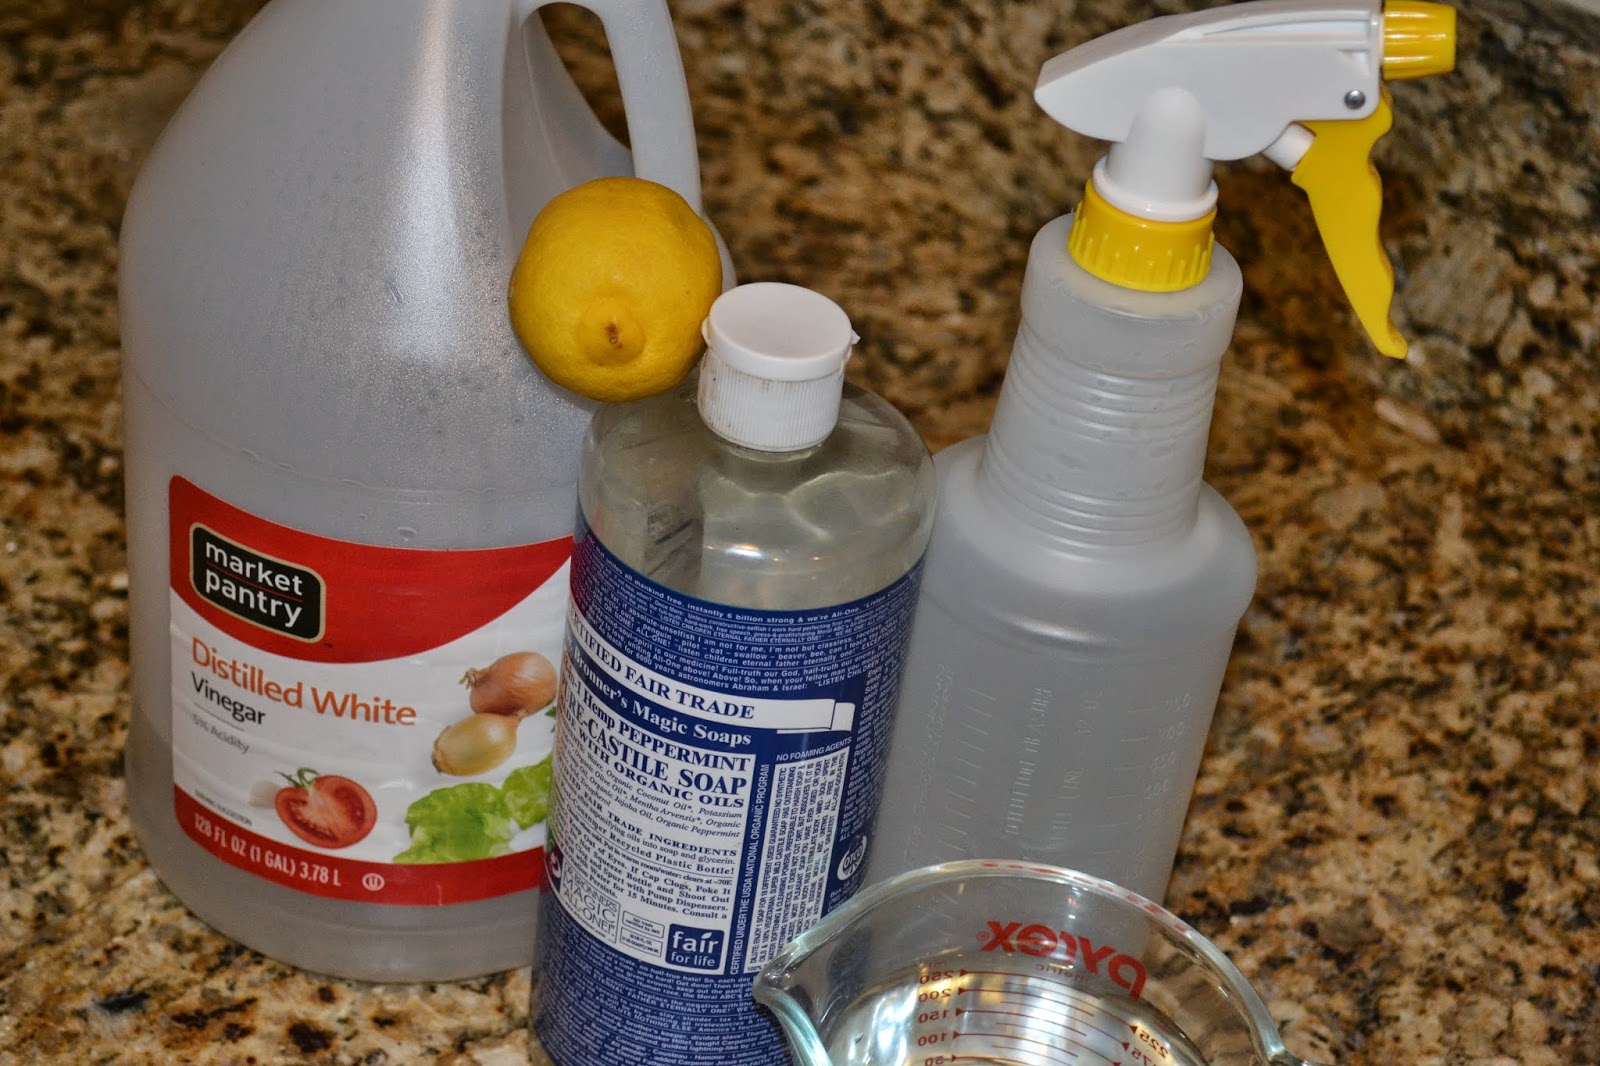
Non-toxic all-purpose cleaning ingredients

Tuesday, April 1, 2014

Non-Toxic Cleaning Basics: Supplies for DIY Recipes

Earlier I shared why you should consider non-toxic cleaning and that DIY non-toxic cleaners are totally cheap!! Cheaper than natural or toxic ones you can buy at any store or online. The list of supplies isn't long and the recipes aren't difficult. Usually you'll just throw several ingredients in a bottle and shake it up!

Containers
  • Large plastic spray bottles: I prefer 26-32 ounce bottles. Most recipes call for a large bottle like that.

  • Small glass jars, such as 4-ounce canning jars: I think these are cheapest at a place like Target or Bed, Bath & Beyond instead of online. I got a 12-pack for $10.50 at BB&B. I like the smaller jars best because it's easiest to dip a rag into or get my hand into it, if needed. You may also want a few larger glass jars.

  • Dark-colored glass spray bottles: Get at least a couple 4-ounce bottles or bigger. You'll need glass jars and bottles for anything that you add an essential oil to because essential oils break down plastic, which means your good-intending, DIY natural cleaner would be toxic. I think you can store essential oils in stainless steel and plastics that are #7 and up, but those are rare and I'm not positive on that. I'm still doing some essential oil research.

Cleaners
photo credit: Oprah.com
  • Distilled white vinegar: Get at least one gallon; or get in bulk from Costco. Use straight, undiluted distilled white vinegar for cleaning stainless steel. Vinegar is the base of many DIY cleaning recipes and is pretty good at killing germs, especially when paired with other natural cleaners.

Sunday, August 11, 2013

Garden update after moving

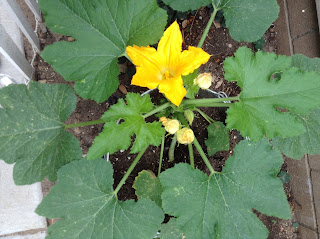
I brought five plants with me when we moved: basil, Romaine lettuce, green bell pepper, zucchini, and squash. The zucchini and squash seem to be slowly withering, while the others are thriving.


Anyone have any suggestions for the squash and zucchini? I took off the dead stuff yesterday and shook out the leaves, carefully. I also rinsed the leaves down on the top and backsides. I'm afraid they really might just need more space, but I can't plant them yet, unless our homebuilder would let me... The basil looks a little withered in the picture, but it just got water, so it was thirsty.


DIY Roll-on Sunscreen

We tried some sunscreen by Kiss My Face that's approved by EWG, but we didn't like it ant it was expensive. It did the job well, but it didn't rub in easily or well. So, I started looking for a DIY natural option, and here's my first outcome:

Almond oil -- originally purchased off Amazon; 16 oz for around $10
Dark glass roll-ons -- Amazon; $8
Carrot seed essential oil -- Amazon $14
Other essential oils -- purchased various places for varied prices

Here are some tips about DIY sunscreen and such: 
When using essential oils you should store in dark containers because light "kills" essential oil. 
Carrot seed oil, from my research, naturally has around 35-40 SPF, which is the highest.
Almond oil, coconut oil, shea butter, and cocoa butter all have around 2-5 SPF, so they're great additions to a DIY sunscreen since they also moisturize your skin. I'm going to do a post on making sunscreen with some of those items too.
Citrus oils do not belong in sunscreen; they encourage the sun's rays instead of repelling them!
Sunscreen needs beeswax to be semi-waterproof, so this mixture isn't waterproof. Stay tuned for a post on waterproof DIY sunscreen.

I put in about 12 drops of carrot seed first, the same amount of one of the other oils, and then filled each container with almond oil. I snapped on the tracking ball and lid, and then swished the mixture around. Carrot seed oil carries a strong earthy scent, so you definitely want to tone it down if you use it. Even with 12 drops of another oil in each batch, you can't really smell the other oil, but it does tone it down some. In fact, you may just want to wait to apply this until you're outside. It should work immediately, unlike purchased sunscreen. 

Wednesday, July 17, 2013

Natural Bug Bite Relief and Healing

http://upload.wikimedia.org/wikipedia/commons/e/e4/Lemon.jpg
Last week I hung out with my cousin outside a coffee shop because it was too noisy inside, it got dark, and we got bit by mosquitos. I had probably ten bites total. Within a few hours of noticing the annoying itch, I was flipping through Facebook and saw natural relief for mosquito bites posted by Mama Natural. One of the suggestions was to rub lemon right on the bite, so I did.

After 1 day of lemon rubbing: It relievef the itchiness, not completely though. The lemon also seemed to be healing the bites well. The redness spread out from the bite, but the skin was less puffy.

After 2 days: The skin just had red sections where the bites were instead of any raised sections. Some of the bites scabbed and fell off. The bites were much less itchy.

After 3 days: On the third day after getting bit, I only needed to relieve itchiness once, right when I woke up. The bites continued to heal, becoming smaller red spots that were no longer itchy.

For other suggestions, see 9 DIY Home Remedies for Relieving Itchy Mosquito Bites

Friday, June 14, 2013

Garden Update Week #4

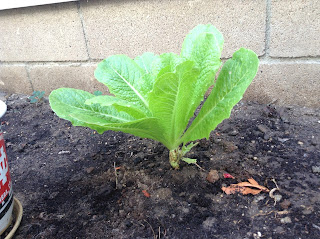
My plants have been growing so well!! Here's my lettuce:
The original lettuce is growing tall, and the one in the pot is growing fabulously. I don't think the others are getting enough sun. Here's my zucchini:
It's had four blooms on it, so I'm very excited for the fruit it will give us! Here's the squash:
A couple weekends ago I replanted the squash and zucchini into five-gallon metal paint buckets, and since then the squash has taken off! It looks like it will flower soon. I love the metal paint buckets because they look cute and they were under $3 each! My husband just punched three holes in the bottom of each one with a hammer and a screwdriver. Why buckets? We're moving soon, and I really wanted to take my plants with me. When I re-planted, I added a little 10-10-10 fertilizer, as suggested by Omar, and fertilized the rest of the plants in the yard also.

When I re-planted a couple weekends ago, I also planted green bell pepper seeds. I have kept it in the house though in a bay window in the dining room. Finally, this week I noticed a tiny green sprout!
I also grow green onions in clear jars in the bay window. All you have to do is change the water each day. I had no luck growing them from seeds in the yard.
A couple weekends ago, I also bought a large sweet basil plant and re-planted it in a metal bucket too. I have yet to take the time to use it in any of my cooking, but I have plans to make my own pesto in the future. In fact, I recently pinned a recipe for pesto to my Pinterest recipes. Check it out!
Lastly, here are a couple roses that bloomed recently. They're so beautiful, I had to share!

Wednesday, May 22, 2013

First Garden Update!

So sorry it's been awhile since I posted! Craziness! I do work part-time, care for my child full-time, and help with all the household chores, so blogging becomes a last priority quite often. This past Saturday, I planted a new batch of Romaine lettuce seeds, and to my astonishment, I already noticed green seedlings popping up!! I'm so excited!! Here's a look at my garden:
Can you see the little green sprouts?! I planted some in a pot and others in the ground, for comparison.
Thank you, Suzy for starting this squash plant for me!!

And again, I thank Suzy for starting this plant for me!!
The following two photos are of my first lettuce seeds planted. I planted them in mid-February and have already harvested from the plant a couple times. I was having serious problems with rolly-pollies eating my lettuce, but I found a solution! I was in Lowe's looking at bug killers, and one of them said "contains Lemongrass: a natural insecticide." So I thought, "What if I just use Lemongrass essential oil mixed in water as my bug killer?" So, that's what I've done, and it works! I barely ever have bite marks out of my lettuce now!!

I also have rosemary, but I just cut it back a ton because it got scorched by the recent heat wave. There's still green on it, so I'm hopeful it will grow back nicely again as long as it's watered well. Additionally, I'm growing green onions, but not on the patio. More on that in another post though.

What's in your garden? Or do you have aspirations to grow a garden? 

Wednesday, May 1, 2013

Make your Own Deodorant--EASY

Antiperspirant makes me itch, but I've never found another deodorant without it that worked well, until I used a men's deodorant. However, that had toxic chemicals in it, I later found out. Boo! So, I mustered up the courage to make my own. It's SUPER EASY! Easier than making a dessert! Check it out!! Plus, a batch like mine costs you less than a dollar!

I made my husband try this, and he LOVES it too! He says it works better than any other deodorant he's ever used, and he didn't use antiperspirant either. He sweats easily and walks around constantly as a teacher, and he's pleased with the results of this deodorant.

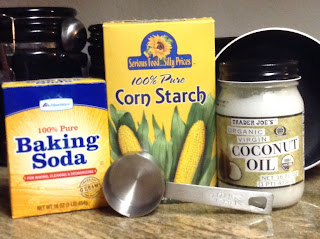
Here's what you need:
  • 1/4 cup of baking soda 
  • 1/4 cup corn starch (not corn flour or any other corn product) 
  • 1/4 cup coconut oil  
  • A small pot
  • A spoon
Here's what you do:

1. Put each ingredient in the small pot.

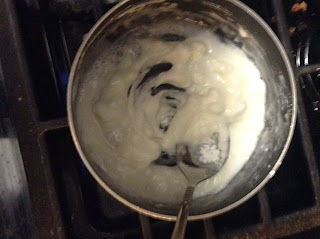
2. Turn the heat on low and start stirring. It starts to melt, but it quite clumpy at first.

3. Stir until it's super smooth. Add a couple drops of an essential oil at this time, if you want. I added the Serenity mixture by Doterra.
4. Let the mixture cool down a bit, and then transfer to a container that's easy to get your fingers into.
Don't let the mixture cool too much, otherwise it won't pour into a container, but you don't want the heat from it to release chemicals from the container into it.


I've been using this for a couple weeks now, and the consistency seems to have dried up a little. It was going on clear at first, but now is a little powdery and white. I'm going to try adding a little more coconut oil to see if that helps.

Has anyone tried this? Do you have any other deodorant recipes you like or want to try? Do you make any other personal care products for yourself?

Tuesday, May 29, 2012

Scraps to Skirt

My niece recently turned two, so I made her a little skirt out of strips of cloth scraps.  I always have leftover scraps from projects, so this was a perfect way to use up some of that.  Originally I saw the idea on Pinterest.
For this project, you'll need:
-Scrap fabric
-Scissors
-1/2" or 3/4" piece of elastic that's smaller than the waist you're making it for
-Sewing machine and thread

First, you can sew the elastic in to a circle.  You should overlap it about an inch, stitching an "X" and a box on the overlapping area for extra stability.  Second, you can start tearing your strips of fabric.  I tried to make all of my strips the same width, but they're different lengths depending on the size of the scraps I had.  To tear the fabric, I simply cut a small notch in the fabric, then tore down it from there.  This can actually be a fun thing to do with older kids or a friend (my husband helped me).  You can choose to tear all your fabric at once or tear as you tie it on the elastic.

Third, start tying the strips on the elastic band.  I knotted the strips on by looping them around the elastic so the fabric would lay more flat, and it covers the band more nicely than a standard knot.  Try to keep the elastic from getting turned around while doing this, though it will stretch a bit.

I hope you enjoy this fun little project!  Little effort, but lots of fun for a little girl.

Thursday, March 29, 2012

Reusbale "Swiffer" Dusters

Tired of buying those Swiffer Dusters?  Man, they're expensive!  A box of ten refills, which includes a new handle and some dusting spray, runs for $9.49 at Costco.  All you need for this project is some fleece fabric, which you can get on sale or clearance usually.  Probably a half yard would do, which might cost $3.  Thus, you'll SAVE about SEVEN DOLLARS after using your reusable dusters just ten times.

I put Swiffer in quotes because these aren't really by Swiffer now, they're made by you and me!  However, they do fit the Swiffer Duster handle, or you can make them to fit any other similar duster handle.  Also, I can't take credit for this idea; I saw it on Pinterest.  If you don't have access to a sewing machine or refuse to sew, you can purchase reusable Swiffer dusters from Mitsuyo Day's Etsy shop.  I also just noticed that she sells reusable sweeper covers which could be used for your Swiffer Sweeper or similar sweeper.

If you have a sewing machine though, you can make some reusable "Swiffer" dusters, like I did.  These could also be great as part of a housewarming gift or wedding shower present, along with some other household cleaning necessities like dish soap, detergent, glass cleaner, surface cleaner, dusting spray, and bathroom cleaner.

What you'll need:
21" x 9" piece of microfleece fabric for one three-layer duster or 14" x 9" for a two-layer duster
A Swiffer Duster handle
Your usual sewing needs: scissors, thread, measuring tape, marking pen or chalk (I prefer chalk)

From the edge of the fabric, measure in 2.5" and place your duster there.


Measure about 1/2" from the bottom of the fabric to the bottom of the center tab of the duster.  Make a horizontal mark at this spot.


Now, trace around the inner and outer edges of the duster--free hand or with a measuring tape is fine.


If you didn't cut a 9" high piece of fabric already: Move the duster out of the way and measure 2.5" up from the top of your trace marks.  Put a horizontal mark here.


Measure 2.5" from the side of your trace marks.  Put a vertical line here, then mark a dashed line along this spot.


Now, fold your fabric under your trace marks to the point where it meets your side trace marks and repeat (if you're layering your duster with three pieces of fabric).  When I did this the first time, I actually did four layers, which proved to be a little much for my machine.


Cut along the folded edges to make two (or three) pieces of the same size.


If you're making a three-layer duster, set aside one layer.  Leave two layers on top of each other, and pull the top layer down a half inch.


Continuing with the three-layer duster instructions: Turn over the two layers and pin the half inch of fabric you pulled down on to the back of the other layer. You may also want to create a half-inch seam on the third piece of fabric, but you don't have to.

If you're doing a two-layer duster, you may want to create a half-inch seam at the bottom anyways.  It will make the duster look nicer and maybe even last longer.  However, you will have to create SEPARATE seams on EACH piece of cloth, not layered on top of each other.


Sew the bottom seam (for each piece of fabric, if you choose), pulling the fabric as flat as you can while you sew. 


Now you should have two pieces of fabric ready to be sewn together; pin them together.  You may want to make sure your duster handle still matches the marks you made earlier on the fabric before you begin sewing.  Only sew the outer edges first.


Once you've sewn the outer edges, insert the duster completely in to the pocket you've created.  Pull the pocket back so you can see where the end of the center tab rests and mark it.  Now, sew down the middle up to the mark you just created.


Last, make cuts around the edges of the fabric in order to create the little "dusting fingers," and you can choose to round the corners at the top if you want to.  Here's the finished product:


For the most effective dusting, pull the top layers of the "dusting fingers" toward the center so that there are more exposed layers of the duster to reach those crevices and corners.


BEFORE YOU WASH, I suggest running a lint roller over the duster to pick off any large dust bunnies you picked up so those don't end up on your clothes or towels.  Otherwise, just throw in your duster with a regular load of laundry as often as you need to!